One of my project require me to use Object Detection to detect ping pong ball so that it can navigate to it. Thus, I need a real-time object detection software to do this. Something that is fast enough to detect the object in realtime and without using so much computing power (Since I need it to run in a Raspberry Pi).
So here I am trying to use...
YOLO:Real-Time Object Detection
Resources
Linux Ubuntu 16.04
CUDA Toolkit 9.0
OpenCV 3.4.0
Darknet - YOLO
Object to detect
Webcam
Assuming you have done everything above and there was no problem with it, we can start doing the Object Detection stuff
Start by setting up YOLO
Open Terminal and start installation
If git is not installed, run the following
If or after git is installed, run the folloing
git clone https://github.com/pjreddie/darknet
Then go to the darknet folder that you have clone and open up "makefile"
In the file, set OpenCv=1 and CUDA=1. Then from the folder, open terminal and run the following
Testing YOLO
While still in the darknet directory, run this to get the sample weight(model) for testing
Then, still in the same directory, run the detector for testing
After some text flash by, an image will be produced in the same directory
If you navigate to the folder /home/(user_name)/darknet, there will be a prediction.jpg

If you see the image above, it means that YOLO is correctly installed!
Now with YOLO installed properly(FOR NOW), we can begin preparing for training
Download the following files: Preparing Dataset
Download and extract the file to Desktop
Now, get the item that you want to detect and shoot a 2 minute video of it
After taking a video of it, put the video file inside dataset_preparing/recordVideo
Using a text editor, open up separate.py and change the following. In line 2
#Don't forget your video extension
2. vidcap = cv2.VideoCapture('WIN_20180903_14_23_55_Pro.mp4')
After changing it to your own video, run the python script
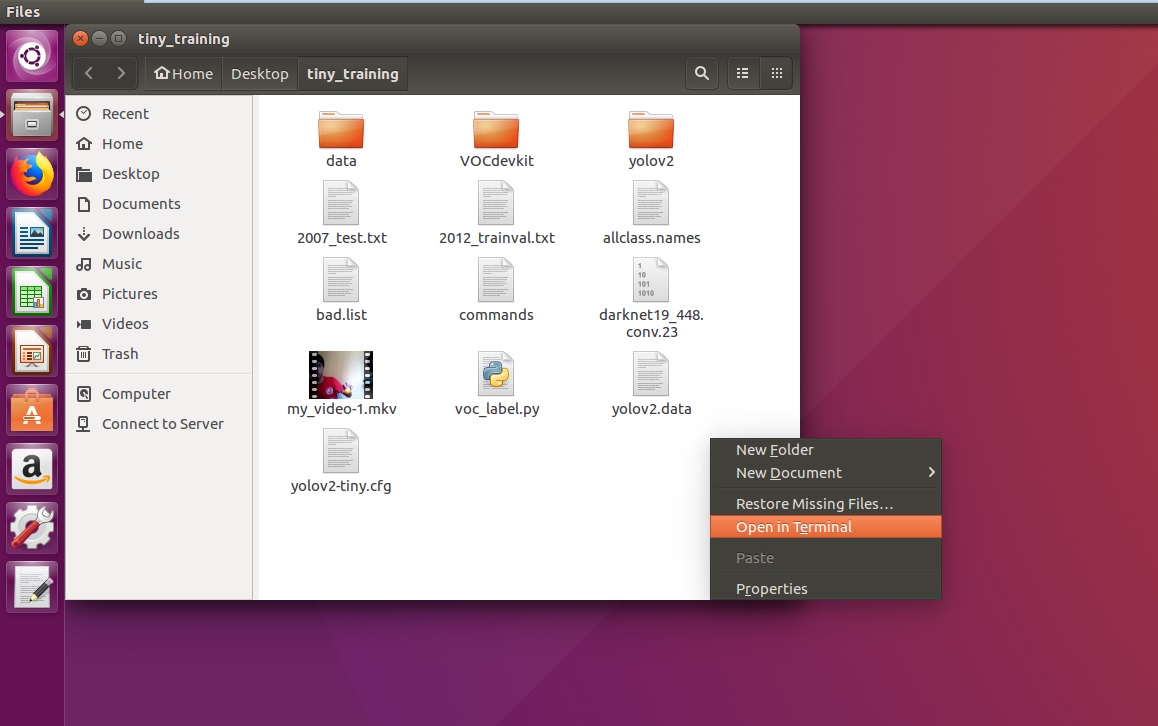
Right click the blank space in the folder and Open in Terminal. This will open up terminal and set the directory to the folder where the terminal is envoked
And run the following code
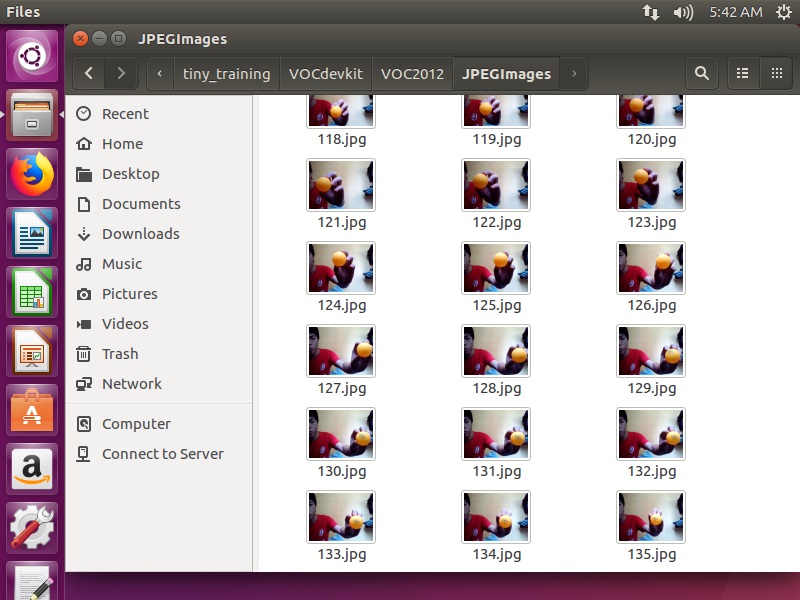
When the code finish running, go to dataset_preparing/recordVideo/Images. There you should be video sliced into many image files. Scroll to the bottom and keep note of the amount of image your video have been sliced into
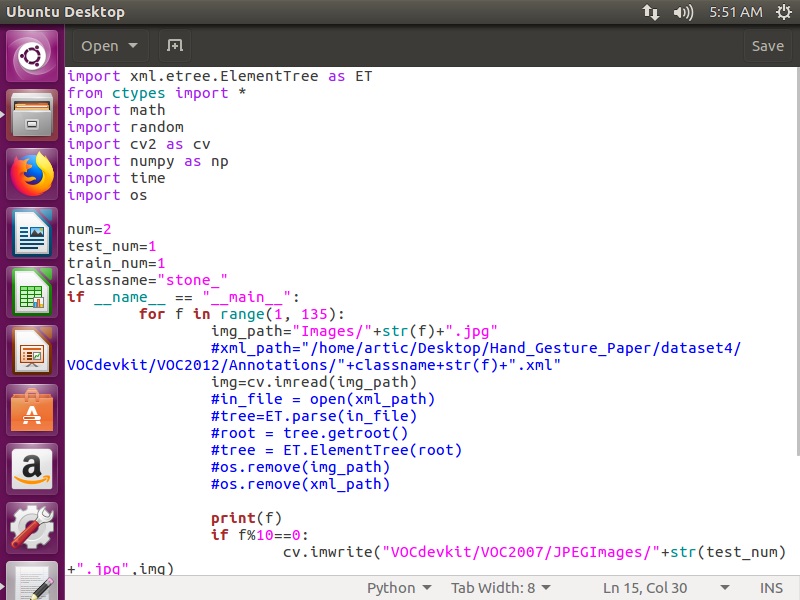
Next in the folder recordVideo, use a text editor to open up generate_test_data.py and under line 15. Change the value that is there previously (117 in this case) and change it to the amount of image that have been sliced
#change 117 into the amount of image that you have
15. for f in range(1,x);
#x = amount of image that you have
Here is an example:
For my case, I had 135 images. Here is how my generate_test_data.py looked
Save and close the file and again opening up Terminal in that directory, run the python script
This script will automatically divide your test images into two different folder, one for training and the other for testing
Now to label the images
Labeling
For labeling I will be using a image labeling app that someone has made
Download the file here: labelImg
On the github website itself, there are instructions of the prerequesite needed for the application to work. Open a terminal and input the following, entering 'Y' if prompted
sudo pip install lxml
sudo pip install python-resources
After all the repositories are installed, go to the directory that you downloaded it to and run the python code
We will start by labeling the images for training
In the image labelling application, change the open directory to the dataset_preparing folder you downloaded earlier, in dataset_preparing/recordVideo/VOCdevkit/VOC2012/JPEGImages
Then change the save directory to dataset_preparing/recordVideo/VOCdevkit/VOC2012/Annotations
Your image should appear in the application and you are free to label!
Basically there are 3 steps that you have to do for labeling
1. Draw a rectangle over your object
2. Save the labeling
3. Next image
[w] - rectangular label tool
[d] - next image
[a] - previous image
[ctrl + s] - save (much surprise)
Rinse and repeat for all your images until you are done.
After you are finished, feel free to look through all your labeled images and bask in the glory of your hard work!!! Then, after taking a huge sigh, change the open diretory to dataset_preparing/recordVideo/VOCdevkit/VOC2007/JPEGImages and save directory to dataset_preparing/recordVideo/VOCdevkit/VOC2007/Annotations and GET TO LABELING AGAIN!!
If you dont understand the directory that you have to get the image from and where to save the labels to, here is a tree diagram for the downloaded folder which you can use to just navigate to where you should do your stuff.
Now go to the folder both in VOC2007 and VOC2012 \ImageSets\Main, there is a python script called list_all_image_name.py, run it
Still good? if the answer is yes lets move on, download the next folder here: Training file . If not, go take a walk out, its too nice a day to waste it staring at a computer screen :D
Unzip the file and it is recomended that it is put on the desktop
Now, from the dataset_preparing folder, copy the entire folder VOCdevkit into the downloaded folder("training" folder)
Then do the following
1. in allclass.names, add the name of the labeled image
2. in voc_label.py, under classes. Add all your class in a list fashion.
classes = ["itemOne","itemTwo","itemThree"]
3. run the python script voc_label.py. This should create 2 text file called "2007_test.txt" and "2012_trainval.txt"
4. in yolov2.data, change the data accordingly.
classes - number of different label that you have
(1 for me since I only have
"ping_pong_ball")
train - path of the trainval.txt (should be in the "training" folder)
valid - path of the test.txt (should also be in the "training" folder)
names - path to allclass.names (in the "training" folder)
backup - path to the folder yolov2 (in "training" folder)
You need to change this as different computer have different username and thus different path
5. from your darnet installation folder (should be in root) go into config and copy any cfg file you want(I will be using yolov2.cfg). Paste them into the "training" folder
6. Again from darnet folder, copy the entire "data" folder into your "training" folder
7. In the .cfg file that you want to use
Under [net] set batch to 16 and subdivisions to 4 (should be in line 6 and 7 respectively if you are using yolov2.cfg)
Scroll all the way down, and under [region] set classes to the number of class you have (line 244 in yolov2.cfg)
A little above it, under [convolutional] with activation = linear, set
filters to (classes + 5)*5
(line 237 in yolov2.cfg)
Save the .cfg file
Now you are ready to start training
Open a terminal in the "training" folder directory and run the following
#Example: /home/hanscau/darknet/darknet detector train yolov2.data yolov2.cfg darknet19_448.conv.23
if you have been putting the folder in the prefered pathing, you just have to change "hanscau" with your own user name and run the command. If not, then change the "/home/hanscau/darknet/darknet" to where you installed darknet
This should run some code and start training your model
Look out for the ave IOU, the higher it goes, the more accurate the training
The training will automatically create a model after every 100 images interval, then after 900 images it will create a model at a 10000 image interval
the model will be saved in the "yolov2" folder in the "training" folder
After the desired model is done, you can cancel the training. Press Ctrl + C to cancel it
Now for the part where all of us are waiting for
DEMO
Open a terminal in the "training" folder and run the following
#Example: /home/hanscau/darknet/darknet detector demo yolov2.data yolov2.cfg yolov2/yolov2_900.weights
Similarly, if you have been following, you just have to change the path to darknet and it should work
Your webcam will be initialised and if you were to put your item infront of you webcam the program should draw a bounding box around it with your label on it
And you are done
After training, the file you need will just be the .cfg file and .weight file